Status Update
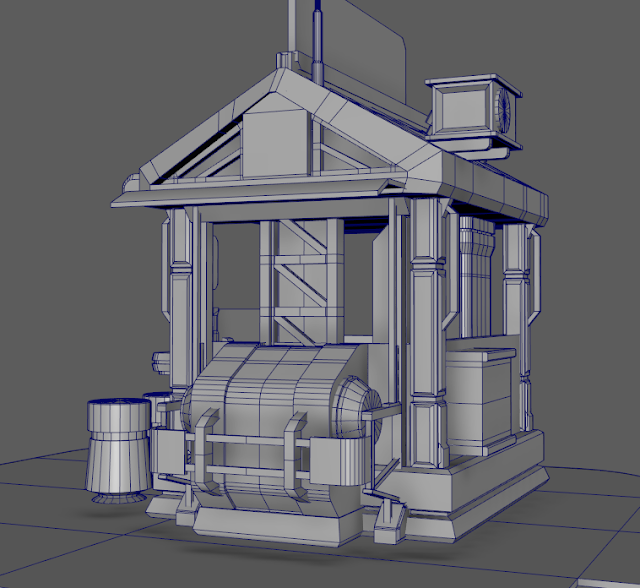
- About 75% of the way done with the modeling phase for the asset. I realized that I won't be doing a high poly of the asset itself so I'll be doing only the high poly in a trim sheet format. I need to finish the backside and the interior now.
- Trim sheet idea content page is done, as well as a test trim sheet to show concept.
- Trim sheet mockup is done. We can test textures on the model once UV's are laid out nicely.
To Due Next Week
- Finish Low Poly / Final Model
- UV Layout
- High Poly of Trim Sheet
- Written Run through on Trim Sheet Creation process (at least my process)
We're about halfway
done with this project already. The trim
sheet should be something I actually should start out with when concepting it
seems like as its very important to know what pieces are going to be modeled in
and what type of trim sheet will you need to make that asset work.
For now I figure I
should have 2 different types of things:
- A trim sheet with major shapes and pieces (70% of detail)
- A trim sheet with minor shapes and pieces OR a unique UDIM page specific to the smaller assets. (30% of detail)
This way I'm able to
get the specific detail I want within the mesh, but also allow for the trim
sheet to be used in other places in the environment (if it had one around it)
to make things feel like they're built from the same product. I'm curious to see the result, especially
since I'm going to be mimicking Valorant
art style. Below is a ton of different
tutorials and documentation that I'll be updating as I find more things about
Trim Sheets or Floater Sheets (note, need to find out the differences within
trim and floater).
Trim Sheet Reference (Free)
- Polygon Academy's Trim Sheet Tutorial
- Reddit Article About Trim Sheets
- Game Textures Full Tutorial (Also adapting pipeline to Blender)
- Environment Iteration Through Trim Sheets by Markus Pichler
- Alex Senechal 80 Level Tutorial
- Alex Senechal Tech Industrial Trim-Sheet Breakdown
- Building a Desert Scene Using Trim Sheets
- Making a High Quality Sci-Fi Modular Environment (Garth Travis)
Extra Tutorials / Resources (Paid)
Polygon Academy
gives you the proper step by step process on how to achieve the results he gets
through a video format. Very easy to
follow and would recommend it for the beginning journey to learn trims. Then a lot of the information in these 80
Level documents or modular environment piece documents are about specific
things that others do slightly different so that’s good. Lastly, Alex also has an additional paid
content you can purchase that goes into more strict detail on how well you can
modularize everything it seems. I
haven't bought it yet, but in general he is incredibly knowledgeable about this
subject and absolutely worth checking out.
Also totally check out Alex Senechal's
Youtube channel. What he talks about on
his channel is super dope and definitely worth the time to work through
everything.
Now for progress
images.
Steps Currently Done for Trim Sheet Pipeline
Integration
- Created a reference image board for the product.
- Put all of the artist's work onto a Pure Ref and up resolution some portions of image for readability
- Used PureRef to gather images directly from Valorant and gathered reference for what type of detailing the textures would be.
- Went to Photoshop and cut and trimmed down the images to get just the texture desired. Straightened the image out and placed it onto a predefined trim sheet size to prep for making the high resolution FBX in Maya.
- Maya Creation
- Worked on a blocked out version of the building keeping into consideration the scale of a normal sized human.
- Polishing block out of building, refining as I go and fixing certain problem areas that I knew I needed to tackle to be ready for UV's.
- Semi-modularized assets to account for integration into UE4 and allowing for kit bashing if needed for other projects.


No comments:
Post a Comment